Making a New Saddle
© Frank Ford, 8/24/00; Photos by FF, 6/17/00
Raising the action at the saddle is really just the reverse of lowering it, but it requires a bit more judgment and effort. If the saddle only needs to be a little bit higher, it may be reasonable to lay a small shim underneath to raise it.
Even though a shim is not integral with the saddle or even made of the same material, it is unlikely to have an adverse effect on tone. (In my opinion, of course.) If you look at the way the strings bear on the saddle you'll notice that there's a lot of forward thrust. So, the saddle makes strong positive contact with the sides of the slot in which it rests.
Shims frequently have an adverse effect on structural integrity, however. A higher saddle will obviously have a greater "forward" load on it as a result of string tension. Thick shims underneath will reduce the saddle slot's effective depth, and its ability to hold the saddle upright.
Most of the time, I prefer to raise the saddle by replacing it. That way, I'm assured of its strength. In this little article, I'll describe a method for making a new saddle with no specialized tools, as a reminder that it's a possible do-it-yourself job.
Most modern guitars have their saddles held captive in a slot. The saddle can be removed by simply lifting it out, and unless there's a pickup element in it or underneath, the saddle can be replaced by simply sticking a new one in after forming it to fit neatly. (A piezo pickup sensor under the saddle may require you to know something about pickup installation, and I won't be covering that in this article.)
Old Martins, and some vintage style reissues, often have their saddles glued in place in a slot that cuts through at both ends. These are not easy to replace, and are best left to an experienced luthier.
Here's the subject, a Martin D-18:
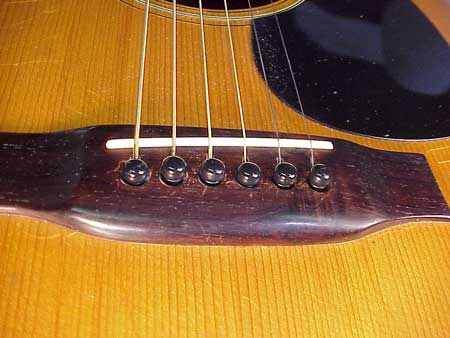
This guitar's action is quite a bit too low with the existing saddle, so I'll make a new one to raise the action.
Here's the saddle removed from the bridge, along with a new bone "blank" which is considerably oversize in all three dimensions:
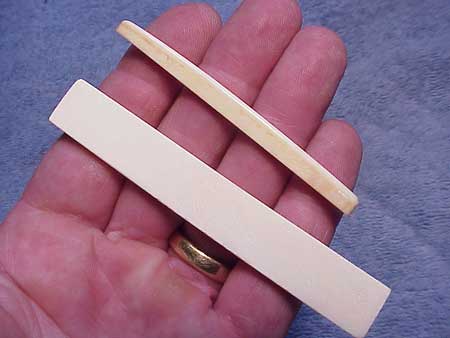
Bone is the most universally agreed upon natural material, being hard, dense, and economical.
First, I'll mark the blank to cut off excess length, leaving it just a bit longer than my original:
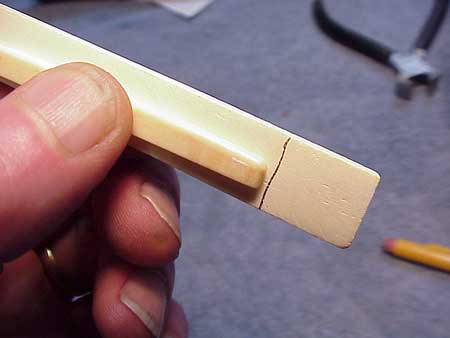
A plain old hacksaw does a fine job cutting bone:
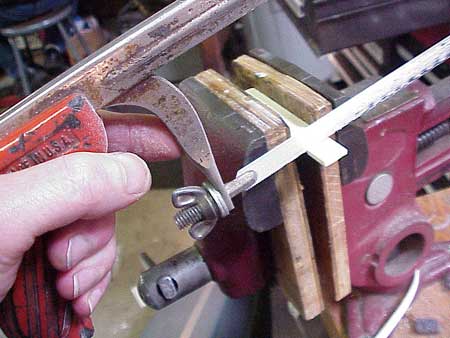
Same thing for the height. I'll mark the saddle blank to cut off excess, leaving more height than I'll need"

The idea is to reduce the effort in thinning the blank to fit the saddle slot. The blank isn't really straight and flat, so I'll rub it on a piece of 150 grit sandpaper I have clipped to an old marble cutting board:
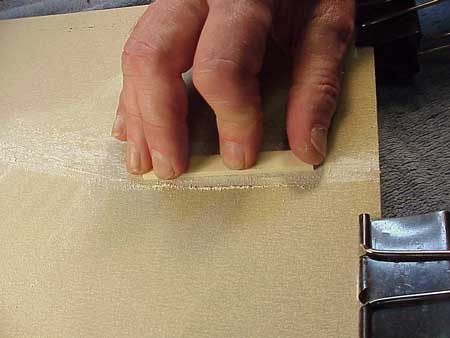
A flat counter top works just as well as a sanding surface. In fact, it's amazing how fast and easy it is to shape bone by rubbing it on sandpaper. Notice in the photo above, I'm holding the blank with as many fingers as possible. The idea is to keep the pressure distributed evenly to avoid bending or distorting the saddle as I sand.
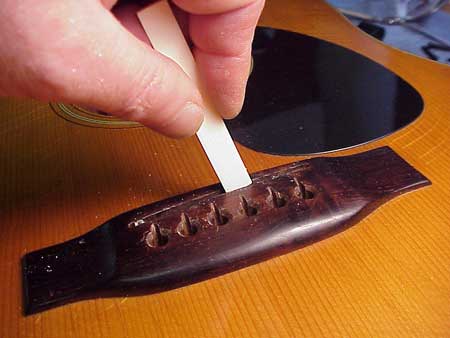
Once I have the blank flattened, I start trial fitting it into the saddle slot. Flipping saddle over to sand the opposite side, retrying the fit over and over, I manage to get the saddle to fit neatly into the slot.
It's important for me to try both ends of the saddle into the slot, and to try the ends of the blank into both ends of the saddle slot. It is always possible for the saddle slot to be a bit uneven, and given the choice, I'd like my saddle to fit tightly all along its length:
Once I get the blank to fit into the slot, I'll start to shape it. The ends of the slot are usually rounded because the slot was made by a rotary cutter. Now, it seems logical that I'd want to make the ends fit perfectly, but it turns out not to be all that necessary. If my saddle has nice approximate rounded ends and is the right length, it will fit so neatly into the slot that any tiny gaps at the ends will disappear.
By "wiping" the saddle back and forth against the flat sanding surface, I can form those rounded ends:
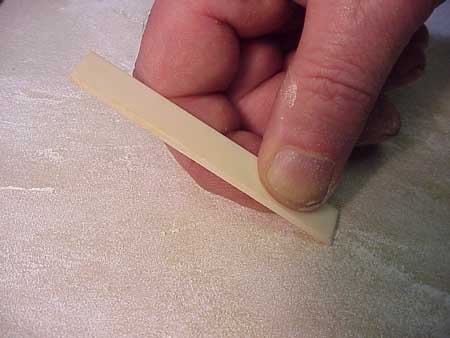
While it looks best to have the rounded ends exactly matching the curve of the rounded ends of the saddle slot, that's really just a matter of cosmetics. A little gap a the end of the saddle does no harm either structure or tone.
After a few tries, I get the length just about right, and the saddle will press down into the slot:

Ideally, it fits tight enough that I need a pair of pliers to lift it out, but just loose enough that I can push it down by hand. I wouldn't drive it in with a hammer for fear of splitting the bridge! (If I get the blank too thin by accident, I'll start over.)
More